Knitting a sweater is a milestone for many knitters. It’s one of those projects that might seem intimidating at first but is incredibly rewarding once you see the finished product. Whether you’re crafting your first wearable item or expanding your handmade wardrobe, learning how to knit a sweater is a fantastic goal that builds skill, confidence, and creativity.
This comprehensive guide will take you through every step of the process—from selecting materials and understanding sweater patterns to shaping sleeves and seaming pieces together. With time, patience, and a little yarn, you’ll go from beginner to sweater-knitter in no time.
Contents
- Why Knit a Sweater?
- What You Need Before You Start
- How to Read a Sweater Pattern
- Sweater Construction Methods
- Step-by-Step: How to Knit a Sweater
- Common Sweater Knitting Mistakes
- Tips for Success
- When to Try More Advanced Sweaters
- 5 Free Patters Here
- 1. Classic Crew Neck Sweater
- 2. Top-Down Raglan Sweater
- 3. Cable Knit Aran Sweater
- 4. Fair Isle Colorwork Sweater
- 5. Oversized Drop-Shoulder Sweater
- Final Thoughts
Why Knit a Sweater?
Knitting a sweater isn’t just about making clothes; it’s about creating something uniquely yours. You choose the yarn, the fit, the pattern, and the style. Plus, hand-knit sweaters are warmer, more comfortable, and way more personal than anything bought in stores.
Some of the top reasons to knit a sweater include:
- Gaining a sense of accomplishment
- Customizing fit, color, and style
- Building intermediate-to-advanced knitting skills
- Making meaningful gifts
- Creating sustainable, slow fashion pieces
What You Need Before You Start
Before diving into your first sweater, gather the right tools and materials. Having the correct supplies makes the process smoother and helps ensure a good final result.
Choosing the Right Yarn
Sweaters require more yarn than smaller projects, so it’s essential to choose wisely.
- Weight: Most beginner patterns use worsted or aran-weight yarn. These yarns knit up quickly and are easier to manage.
- Fiber: Wool is warm and elastic, perfect for sweaters. Blends of wool with acrylic, alpaca, or cotton also work well depending on the season and desired drape.
- Color: Choose a solid or semi-solid yarn if you’re just starting; complex variegated yarns can hide stitch definition.
Always buy enough yarn in the same dye lot to avoid color mismatches.
Selecting Needles
Depending on your pattern, you’ll need:
- Circular needles for knitting in the round or working large panels
- Double-pointed needles for sleeves or necklines
- Straight needles for flat panels (if applicable)
- Make sure to check the needle size listed in your pattern
Wood or bamboo needles can be easier for beginners because they grip the yarn better and are less slippery than metal needles.
Additional Supplies
- Stitch markers
- Tapestry needle
- Scissors
- Measuring tape
- Row counter or notebook
- A good pattern (more on that soon)
How to Read a Sweater Pattern
Understanding a knitting pattern is half the battle. The key is to take your time and break it down section by section.
Common Pattern Components
- Materials list – Yarn, needles, gauge, and notions
- Gauge – Critical for sweater fit; usually measured as stitches per 4 inches
- Sizing – Always check the bust/chest measurements and finished garment size
- Instructions – May be written line by line or charted
- Abbreviations – K (knit), P (purl), CO (cast on), BO (bind off), RS (right side), WS (wrong side), etc.
Don’t be intimidated by abbreviations or charts. Once you knit your way through a few rows, it becomes second nature.
Sweater Construction Methods
Sweaters can be constructed in different ways. Each method has its pros and cons. Choose one based on your experience and comfort level.
Top-Down Sweaters
- Knit in the round from the neckline downward
- Try on as you go—perfect for customizing fit
- Usually seamless
Bottom-Up Sweaters
- Start at the hem and work upward
- Often involves joining body and sleeves at the yoke
- May require seaming at the end
Flat Panel Sweaters
- Knit in separate pieces: front, back, and sleeves
- Seamed together afterward
- Easier to manage piece by piece for some knitters
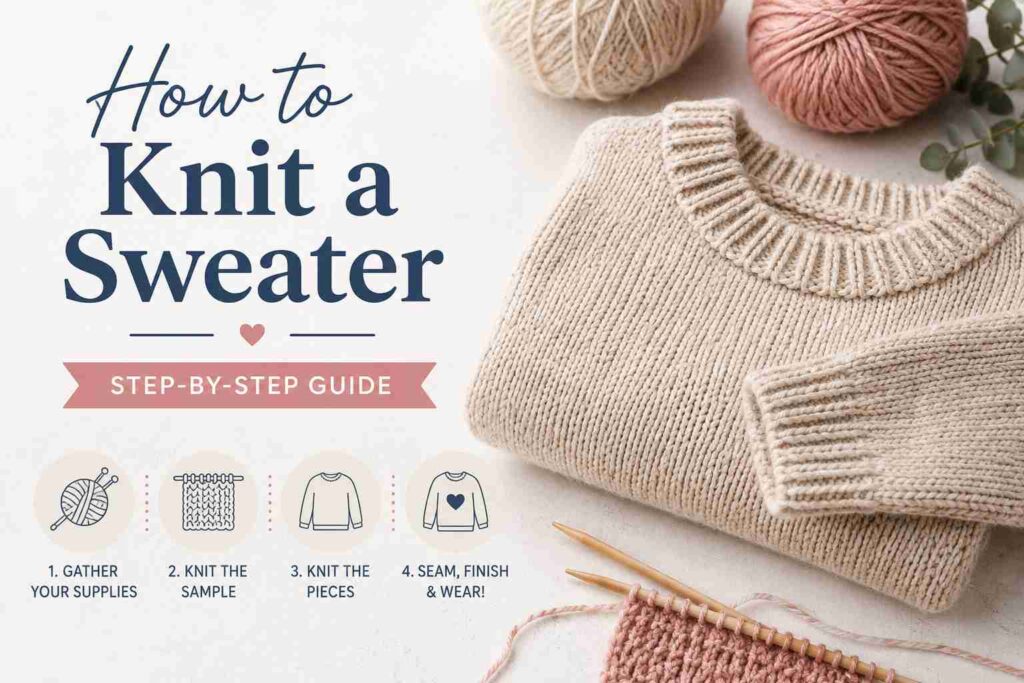
Step-by-Step: How to Knit a Sweater
Step 1: Choose a Beginner-Friendly Sweater Pattern
Pick a pattern with simple construction, minimal shaping, and clear instructions. Look for patterns labeled as “easy” or “beginner.”
Popular beginner sweater types include:
- Drop shoulder sweaters
- Raglan sweaters
- Boxy or oversized styles
Free and paid patterns are available online, in books, or through yarn brands.
Step 2: Knit a Gauge Swatch
Gauge is essential. If your stitches are too tight or too loose, your sweater won’t fit.
- Knit a 6″ x 6″ swatch using the stitch pattern from your sweater.
- Block the swatch by wetting and drying it according to yarn instructions.
- Measure how many stitches and rows are in 4 inches.
- Adjust needle size if needed:
- Too many stitches = switch to larger needles
- Too few stitches = switch to smaller needles
Step 3: Cast On and Knit the Body
Follow your pattern instructions carefully:
- If working in the round, cast on the required number of stitches and join without twisting.
- If working flat, cast on for the front or back panel.
- Begin knitting the body according to the stitch pattern (e.g., stockinette, ribbing, garter).
- Add shaping if required (waist, bust, hips).
Keep track of your rows with a counter or checklist.
Step 4: Knit the Sleeves
Sleeves may be knit flat or in the round depending on your pattern.
- Use double-pointed needles or magic loop method for knitting in the round.
- Decrease stitches as instructed to shape the sleeve.
- Knit until the sleeve reaches the desired length.
- Some patterns allow you to pick up stitches directly from the body for seamless sleeves.
Step 5: Shape the Neckline and Shoulders
Neck and shoulder shaping varies by pattern.
- Use short rows or bind off in steps to shape curves.
- Some necklines require ribbing or a collar that’s picked up and knit later.
- For raglan sweaters, decreases will shape the shoulders naturally.
Step 6: Seaming (if applicable)
If you knit your sweater in pieces, now it’s time to seam them together.
- Use mattress stitch for invisible seams.
- Sew side seams, then attach sleeves to the armholes.
- Finish by sewing shoulder seams and neckline if necessary.
Take your time. Blocking beforehand can make pieces easier to join.
Step 7: Add the Neckband and Edging
Most sweaters have a neckline band, ribbed hem, and cuffs.
- Use smaller needles for ribbing to keep the edges snug.
- Pick up stitches around the neckline and knit ribbing (e.g., K1, P1 or K2, P2).
- Bind off loosely to maintain stretch.
Step 8: Weave in Ends and Block the Sweater
Finishing touches are critical for a professional look.
- Use a tapestry needle to weave in all loose ends on the wrong side of your sweater.
- Block your finished sweater based on fiber type (wet block, steam block, or spray block).
- Lay flat to dry on a clean towel or blocking mat.
Common Sweater Knitting Mistakes
Everyone makes mistakes when learning. Here’s what to watch out for:
Uneven Tension
Inconsistent stitch size is normal for beginners. It evens out with practice and proper blocking.
Skipping the Gauge Swatch
Gauge affects fit. Don’t skip it or assume yours will match the pattern automatically.
Misreading the Pattern
Break your pattern into sections. Highlight important shaping instructions and stitch counts.
Forgetting to Count Rows
Use a row counter or make a tally in a notebook. Mistakes add up quickly.
Poor Seaming
Learn the mattress stitch and block before seaming to ensure even edges.
Tips for Success
- Read through the entire pattern before starting
- Use lifelines (a piece of yarn threaded through a row) to protect your work
- Watch video tutorials for techniques you’re unsure about
- Practice tricky stitches or shaping on a swatch first
- Take breaks and enjoy the process—it’s not a race
When to Try More Advanced Sweaters
Once you’ve knit your first simple sweater, you’re ready to explore new styles:
- Cable-knit sweaters
- Lace yoke sweaters
- Colorwork and fair isle designs
- Cardigans with button bands
- Tunic-length or cropped fits
Each project will teach you new techniques and grow your skills.
5 Free Patters Here
1. Classic Crew Neck Sweater
| Category | Details |
|---|---|
| Difficulty Level | Beginner to Intermediate |
| Construction | Typically knitted in separate pieces (front, back, and sleeves) and sewn together. |
| Neckline | Round crew neck with ribbed edging. |
| Fit | Regular, comfortable fit suitable for all ages. |
| Recommended Yarn | Worsted or DK-weight wool, wool blends, or acrylic. |
| Skills Required | Knit, purl, ribbing, decreases, basic seaming. |
| Advantages | Easy to customize, timeless style, suitable for everyday wear. |
| Challenges | Requires sewing pieces together and shaping the neckline. |
Description
The Classic Crew Neck Sweater is one of the most traditional sweater designs. It features a simple round neckline, ribbed cuffs, hem, and neckband. Because of its straightforward structure, it serves as an excellent introduction to garment knitting. This style can be worn casually or layered over shirts, making it a versatile wardrobe staple.
Typical Pattern Structure
- Knit the back panel.
- Knit the front panel with neck shaping.
- Knit two sleeves.
- Sew shoulder and side seams.
- Attach sleeves.
- Pick up stitches around the neckline and knit the ribbed collar.
2. Top-Down Raglan Sweater
| Category | Details |
|---|---|
| Difficulty Level | Beginner |
| Construction | Knitted from the neckline downward in one piece. |
| Neckline | Usually round or crew neck. |
| Fit | Adjustable and customizable during knitting. |
| Recommended Yarn | DK, worsted, or bulky yarn. |
| Skills Required | Knitting in the round, increases, basic stitch markers. |
| Advantages | No sewing required, easy to try on while knitting. |
| Challenges | Requires careful tracking of raglan increases. |
Description
The Top-Down Raglan Sweater is among the most popular modern sweater constructions. Starting at the neck allows knitters to try on the garment throughout the project and adjust length or fit as needed. Four raglan increase lines extend from the neckline to the underarms, creating the sleeves and body simultaneously.
Typical Pattern Structure
- Cast on neckline stitches.
- Place markers for raglan sections.
- Increase along raglan lines every other round.
- Separate sleeves from the body.
- Finish the body length.
- Knit sleeves from held stitches.
- Add ribbing to cuffs and hem.
3. Cable Knit Aran Sweater
| Category | Details |
|---|---|
| Difficulty Level | Intermediate |
| Construction | Usually knitted in pieces and assembled. |
| Neckline | Crew neck, turtleneck, or shawl collar. |
| Fit | Traditional and slightly relaxed. |
| Recommended Yarn | Aran-weight or worsted wool. |
| Skills Required | Cable knitting, chart reading, stitch manipulation. |
| Advantages | Beautiful texture, warm and durable fabric. |
| Challenges | Complex cable patterns require concentration. |
Description
The Cable Knit Aran Sweater originated from the Aran Islands of Ireland and is famous for its intricate cable patterns. Twisted stitches create raised designs that resemble ropes, braids, and diamonds. These sweaters are highly textured and exceptionally warm, making them ideal for colder climates.
Typical Pattern Structure
- Follow cable charts for front and back panels.
- Knit matching cable sleeves.
- Block pieces before assembly.
- Sew shoulders and side seams.
- Attach sleeves.
- Finish with a ribbed collar.
4. Fair Isle Colorwork Sweater
| Category | Details |
|---|---|
| Difficulty Level | Intermediate to Advanced |
| Construction | Usually knitted in the round. |
| Neckline | Often features a decorative colorwork yoke. |
| Fit | Traditional Scandinavian-inspired fit. |
| Recommended Yarn | Wool with good elasticity and grip. |
| Skills Required | Stranded colorwork, float management, color tension control. |
| Advantages | Stunning multicolored designs and endless customization options. |
| Challenges | Maintaining even tension between colors. |
Description
Fair Isle knitting uses two or more colors within the same row to create repeating geometric patterns. Originating from the Fair Isle region of Scotland, this technique produces beautiful yokes, borders, and all-over motifs. The stranded yarns on the inside add extra warmth and structure to the garment.
Typical Pattern Structure
- Knit ribbed neckline.
- Work colorwork yoke following charts.
- Separate sleeves and body.
- Continue body knitting.
- Complete sleeves using matching motifs.
- Block carefully to even out stitches.
5. Oversized Drop-Shoulder Sweater
| Category | Details |
|---|---|
| Difficulty Level | Beginner |
| Construction | Simple rectangles with minimal shaping. |
| Neckline | Crew neck, boat neck, or wide neck. |
| Fit | Loose, oversized, and relaxed. |
| Recommended Yarn | Bulky, chunky, or worsted-weight yarn. |
| Skills Required | Knit, purl, simple increases and decreases. |
| Advantages | Quick project, forgiving fit, fashionable style. |
| Challenges | Can become heavy if knit with very thick yarn. |
Description
The Oversized Drop-Shoulder Sweater is one of the easiest sweater styles to knit. The body is generally made from two large rectangles, and the sleeves attach below the natural shoulder line, creating a relaxed silhouette. Because it requires very little shaping, it is ideal for beginners learning garment construction.
Typical Pattern Structure
- Knit a front rectangle.
- Knit a matching back rectangle.
- Create simple sleeves.
- Sew shoulder seams.
- Attach sleeves and sew side seams.
- Add neckline and cuff ribbing.
Summary Comparison
| Pattern | Difficulty | Best Feature | Ideal For |
|---|---|---|---|
| Classic Crew Neck | Beginner–Intermediate | Timeless style | Everyday sweaters |
| Top-Down Raglan | Beginner | Seamless construction | First sweater project |
| Cable Knit Aran | Intermediate | Rich texture | Traditional knitwear |
| Fair Isle Colorwork | Intermediate–Advanced | Multicolor designs | Decorative sweaters |
| Oversized Drop-Shoulder | Beginner | Simple construction | Fast, easy projects |
Final Thoughts
Knitting a sweater is a significant step in your journey as a knitter. It’s not just about following a pattern; it’s about patience, creativity, and problem-solving. Whether your first sweater is perfect or not, the experience is invaluable. And the best part? You get to wear your hard work with pride.
With every stitch, you’re building a handmade piece of art. Keep practicing, learning, and growing. Your dream sweater is just a few thousand stitches away.