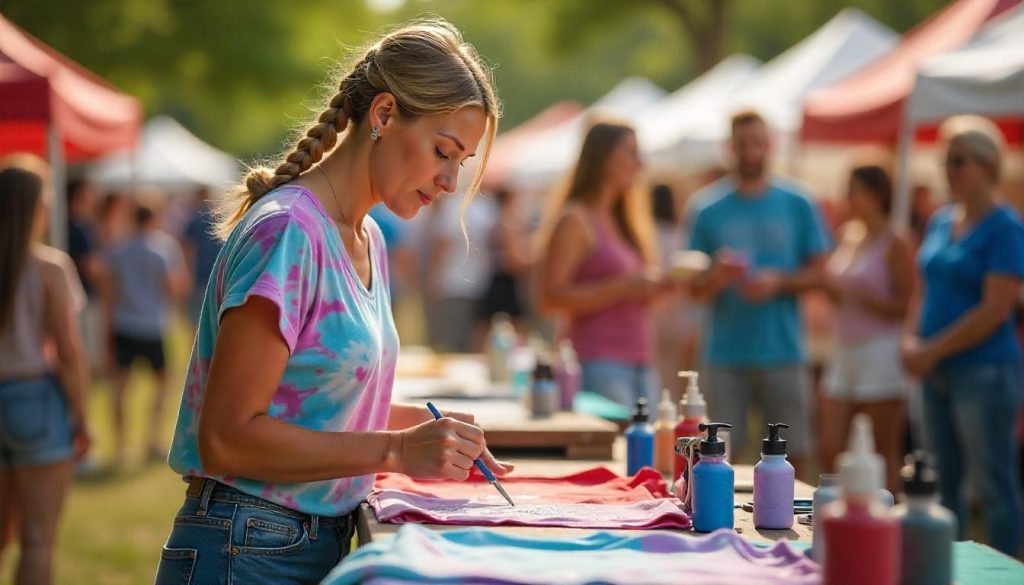
Painting fabric with acrylic paint is a fun and creative way to personalize clothing, home décor, bags, and more. Whether you’re customizing a denim jacket, breathing new life into an old pillow cover, or creating hand-painted gifts, acrylic paint offers vibrant color and long-lasting results when used correctly.
This guide will walk you through how to paint fabric with acrylic paint — covering materials, preparation, techniques, curing, sealing, and tips for long-lasting results. Whether you’re a beginner or an experienced DIYer, this step-by-step post will help you get stunning outcomes on every project.
Contents
- Why Use Acrylic Paint on Fabric?
- Supplies You’ll Need to Paint Fabric with Acrylic
- Preparing the Fabric Before Painting
- Mixing Acrylic Paint with Fabric Medium
- Painting Techniques for Beautiful Results
- Drying and Heat-Setting Acrylic Paint on Fabric
- Washing and Caring for Painted Fabric
- Common Mistakes to Avoid
- Fun Fabric Painting Project Ideas
- Final Tips for Painting Fabric with Acrylic Paint
- Conclusion: Turn Fabric into Art with Acrylic Paint
Why Use Acrylic Paint on Fabric?
Acrylic paint is popular for fabric painting due to its versatility, ease of use, and vivid pigment. When combined with the right medium and technique, it can deliver professional-looking, washable results.
Advantages of using acrylic paint on fabric:
- Widely available and affordable
- Works on a variety of fabrics
- Can be blended and mixed into endless colors
- Dries quickly and permanently
- Easily adaptable with fabric medium
Unlike traditional fabric paint, acrylic paint allows for more control over the texture and opacity, making it ideal for detailed or artistic designs.
Supplies You’ll Need to Paint Fabric with Acrylic
Before getting started, gather all the necessary materials to make your project smooth and successful.
Basic Supplies
–––––––––––––––––––––––––––––––
- Acrylic paint (artist-grade or craft-grade)
- Fabric or textile medium (optional but recommended)
- Pre-washed cotton, denim, canvas, or linen fabric
- Paintbrushes in various sizes
- Water container and palette
- Mixing tray or paper plate
Optional But Helpful Supplies
–––––––––––––––––––––––––––––––
- Stencils or masking tape for clean lines
- Pencil or washable fabric marker
- Sponge or foam brushes
- Fabric markers or pens for fine details
- Wax paper or cardboard (to protect layers of fabric)
- Iron and ironing board (for heat-setting)
Preparing the Fabric Before Painting
Proper fabric preparation is critical to ensure your paint adheres well and doesn’t bleed.
Choose the Right Fabric
–––––––––––––––––––––––––––––––
Natural fibers like cotton, denim, canvas, or linen work best with acrylic paint. Synthetics like polyester may resist paint absorption or require additional prepping.
Wash and Dry the Fabric
–––––––––––––––––––––––––––––––
Always pre-wash your fabric without fabric softener to remove any sizing or coatings that could prevent paint from sticking. Dry it completely before painting.
Iron Out Wrinkles
–––––––––––––––––––––––––––––––
Use an iron to smooth out the fabric so you have a flat surface for painting. Wrinkles can interfere with clean lines and brush control.
Use a Barrier
–––––––––––––––––––––––––––––––
Place cardboard, wax paper, or a thick piece of paper between fabric layers (like inside a shirt) to prevent paint bleed-through.
Mixing Acrylic Paint with Fabric Medium
A fabric medium transforms regular acrylic paint into paint suitable for fabric. It softens the texture, increases flexibility, and helps paint adhere better.
Why Use Fabric Medium?
–––––––––––––––––––––––––––––––
Fabric medium makes acrylic paint:
- Softer and more flexible on fabric
- Easier to apply evenly
- More resistant to cracking or peeling after washing
- Better for light fabrics and wearable art
How to Mix
–––––––––––––––––––––––––––––––
Most brands recommend mixing 1 part fabric medium to 2 parts acrylic paint. Stir thoroughly in a mixing tray or cup before applying.
Some popular fabric mediums:
- Liquitex Fabric Medium
- DecoArt Fabric Painting Medium
- Golden GAC 900
Painting Techniques for Beautiful Results
Now that you’re prepped, it’s time to start painting! Here are several techniques you can use based on your design goals.
Freehand Painting
–––––––––––––––––––––––––––––––
This technique involves painting directly onto fabric using brushes. It’s ideal for original artwork, custom messages, or abstract designs. Start with light pencil sketches if needed, and use small brushes for details.
Stenciling
–––––––––––––––––––––––––––––––
Place a stencil on the fabric and hold it steady using tape or adhesive spray. Apply paint using a sponge or stencil brush, using a dabbing motion to avoid bleeding under the edges.
Block Printing
–––––––––––––––––––––––––––––––
Carve a design into a linoleum or rubber block, then brush it with acrylic paint and press it firmly onto the fabric. This is perfect for repeating patterns or symmetrical designs.
Splatter or Abstract Techniques
–––––––––––––––––––––––––––––––
Use a toothbrush or flicking motion to create artistic splatter effects. You can also blend colors while wet for gradients and tie-dye-inspired patterns.
Layering and Dry Brushing
–––––––––––––––––––––––––––––––
Allow layers to dry completely before applying another coat. Use dry brushing for a textured, vintage look, or layering for more depth and vibrancy.
Drying and Heat-Setting Acrylic Paint on Fabric
To make your design permanent and washable, it must be heat-set. This is one of the most crucial steps.
Let the Paint Dry Completely
–––––––––––––––––––––––––––––––
Allow your painted fabric to air dry for at least 24 hours before moving to the heat-setting stage. Drying times vary depending on fabric type, paint thickness, and humidity.
How to Heat-Set Your Design
–––––––––––––––––––––––––––––––
Using an Iron:
- Turn off the steam function.
- Place a pressing cloth or parchment paper over the painted area.
- Set iron to the fabric-appropriate heat (usually medium-high).
- Press firmly for 3-5 minutes, moving the iron to cover the entire painted area.
Alternative Heat-Setting Methods:
- Tumble dry the item on high heat for 30–45 minutes (if fabric-safe)
- Use a heat gun (carefully, from a distance)
- Oven-cure small flat items like patches (at low temperature, ~250°F for 15 mins)
Washing and Caring for Painted Fabric
To preserve your art, take care when washing and storing painted fabrics.
First Wash Tips
–––––––––––––––––––––––––––––––
Wait at least 72 hours after heat-setting before washing. Hand washing is best for delicate or detailed designs.
General Care Guidelines
–––––––––––––––––––––––––––––––
- Turn garments inside out before washing
- Use cold water and gentle cycle
- Avoid harsh detergents or bleach
- Air dry when possible to reduce wear
- Never iron directly on the paint
Common Mistakes to Avoid
Even simple projects can go wrong if key steps are skipped. Here are common mistakes and how to avoid them.
Not Prepping Fabric Properly
–––––––––––––––––––––––––––––––
Skipping the wash or ironing stage may cause uneven application, fading, or paint peeling after a few washes.
Skipping Fabric Medium
–––––––––––––––––––––––––––––––
Using pure acrylic paint without fabric medium may result in stiffness, cracking, or poor adhesion—especially on wearable items.
Not Heat-Setting the Paint
–––––––––––––––––––––––––––––––
This step is essential to make the paint washable and permanent. Without it, designs will fade or wash out.
Using the Wrong Brush Type
–––––––––––––––––––––––––––––––
Soft synthetic brushes are ideal. Avoid stiff bristle brushes that can leave streaks or lift fibers.
Painting Too Thick
–––––––––––––––––––––––––––––––
Thick paint layers take longer to dry and may crack when bent. It’s better to apply multiple thin layers for vibrancy and flexibility.
Fun Fabric Painting Project Ideas
Not sure where to start? Here are beginner-friendly and fun fabric painting ideas for personal use or gifting.
Custom T-Shirts
–––––––––––––––––––––––––––––––
Create a graphic tee with quotes, characters, or hand-painted flowers.
Hand-Painted Tote Bags
–––––––––––––––––––––––––––––––
Perfect for gifting, groceries, or book bags. Add plants, names, or animal motifs.
Painted Pillow Covers
–––––––––––––––––––––––––––––––
Add color to your couch with hand-painted patterns, mandalas, or initials.
Denim Jackets or Jeans
–––––––––––––––––––––––––––––––
Paint on the back of a jacket or down a pant leg for stylish streetwear.
Canvas Aprons or Tablecloths
–––––––––––––––––––––––––––––––
Great for holiday themes, kitchen décor, or garden wear.
Kids’ Clothes and Baby Gifts
–––––––––––––––––––––––––––––––
Add fun animals, stars, or names to onesies and bibs.
Final Tips for Painting Fabric with Acrylic Paint
- Test your color mix on a fabric scrap first
- Tape down the edges of your fabric to prevent shifting
- Always wash brushes immediately after use
- Start simple, then move on to more detailed work as your skills grow
- Don’t be afraid to experiment — that’s how your unique style develops
Conclusion: Turn Fabric into Art with Acrylic Paint
Acrylic paint opens the door to endless fabric design possibilities. With the right tools, preparation, and a little creativity, you can transform plain materials into one-of-a-kind works of art. Whether you’re creating wearable art, personalized gifts, or DIY home décor, acrylic fabric painting is a rewarding and accessible craft.
Ready to get started? Gather your supplies, pick your design, and let your creativity flow — one brushstroke at a time.