A beautifully tied bow can add the perfect finishing touch to gifts, wreaths, clothing, hair accessories, and home décor. Whether you want to make a simple ribbon bow for a present or an elaborate multi-loop bow for decorations, mastering this skill will enhance your creative projects.
This guide will take you through different methods of making bows out of ribbon, from basic single-loop bows to intricate layered designs.
Contents
Why Learn to Make Ribbon Bows?
Ribbon bows are a versatile craft element that can be used in various ways. Whether you are decorating for a special occasion or personalizing a gift, making your own bows allows you to customize colors, styles, and sizes.
Benefits of Learning to Make Ribbon Bows
- Saves money by making custom bows instead of buying them
- Allows personalization with unique color and material choices
- Adds a professional, polished look to gifts and decorations
- Provides a fun and creative DIY activity
Materials Needed for Making a Bow
Before you start, gather the right materials to make the process easier.
Basic Materials
- Ribbon (satin, grosgrain, organza, wired, or velvet)
- Scissors (sharp for clean edges)
- Hot glue gun (optional for securing the bow)
- Wire or pipe cleaners (for structured bows)
- Double-sided tape or glue dots (for gift-wrapping bows)
- Ruler (to measure ribbon lengths accurately)
Choosing the Right Ribbon
Different types of ribbons create different styles of bows.
- Satin ribbon: Smooth and shiny, great for elegant bows
- Grosgrain ribbon: Textured and sturdy, ideal for structured bows
- Organza ribbon: Sheer and lightweight, perfect for delicate bows
- Wired ribbon: Holds shape well, best for large decorative bows
- Velvet ribbon: Luxurious and soft, excellent for holiday and vintage-style bows
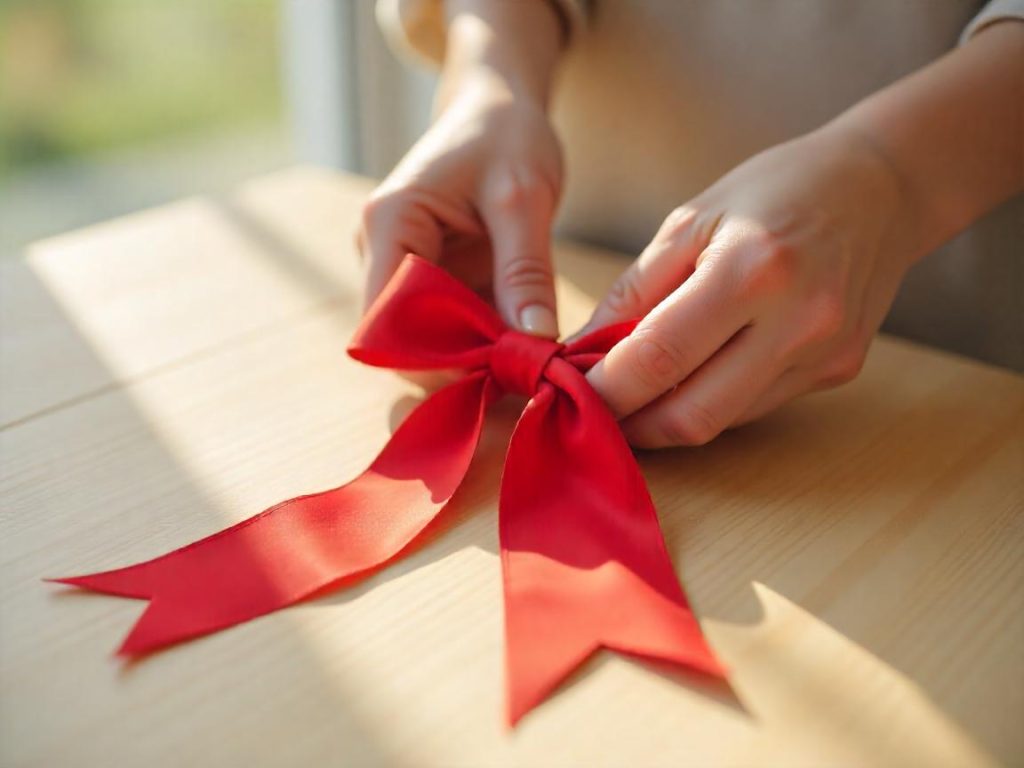
How to Make a Basic Bow
A simple bow is the foundation for many decorative designs.
Step 1: Cut the Ribbon
- Measure and cut a piece of ribbon about 12 inches long.
- If you want a larger bow, use a longer ribbon.
Step 2: Form a Loop
- Hold the ribbon in both hands and create a loop on one side.
- Make sure the tail ends are even for a symmetrical bow.
Step 3: Cross the Loops
- Take the right loop and cross it over the left loop.
- Pull the right loop under and through the opening at the bottom.
Step 4: Tighten the Bow
- Gently pull the loops to tighten the knot in the center.
- Adjust the loops and tails to create an even shape.
Step 5: Trim the Ends
- Use scissors to cut the ends at an angle for a polished look.
- To prevent fraying, lightly run a flame along the cut edges of synthetic ribbons.
How to Make a Double Loop Bow
A double-loop bow adds extra volume and elegance.
Step 1: Cut a Longer Ribbon
- Use 18-24 inches of ribbon for a fuller bow.
Step 2: Make Two Loops on Each Side
- Create two loops on both the left and right sides.
- Ensure the loops are even for a symmetrical look.
Step 3: Tie the Center
- Take one loop and cross it over the other.
- Pull it through the bottom opening and tighten it.
Step 4: Adjust and Trim
- Fluff the loops to add dimension.
- Trim the tails at an angle for a neat finish.
How to Make a Bow with Wired Ribbon
Wired ribbon bows hold their shape well, making them ideal for wreaths and decorations.
Step 1: Cut the Ribbon
- Measure about 24 inches of wired ribbon.
Step 2: Make Loops
- Fold the ribbon back and forth to create multiple loops.
- Hold the center tightly as you fold.
Step 3: Secure the Center
- Wrap a pipe cleaner or floral wire around the middle and twist it tight.
Step 4: Fluff the Loops
- Pull the loops apart and shape them by bending the wire.
Step 5: Cut and Curl the Tails
- Cut the tails in a V-shape for a decorative touch.
- If using wired ribbon, curl the ends slightly for an elegant effect.
How to Make a Bow for Gift Wrapping
A beautifully tied bow adds a personal touch to any present.
Step 1: Wrap the Ribbon Around the Gift
- Lay the ribbon flat across the box and wrap it around the sides.
Step 2: Tie a Simple Bow on Top
- Use the basic bow method and tighten the loops.
Step 3: Add a Decorative Touch
- Attach a second ribbon layer in a contrasting color.
- Use a small decorative embellishment in the center.
How to Make a Pom-Pom Bow
Pom-pom bows are perfect for gift wrapping and festive decorations.
Step 1: Cut Multiple Strips of Ribbon
- Cut 8-10 pieces of ribbon, each around 10 inches long.
Step 2: Stack and Tie the Ribbon
- Stack the ribbons in a crisscross pattern.
- Tie them tightly in the center with a small piece of ribbon or wire.
Step 3: Fluff and Shape
- Separate the loops and arrange them in a circular shape.
Step 4: Secure with Glue (Optional)
- Use a glue gun to keep the loops in place.
Creative Ideas for Using Ribbon Bows
Once you’ve mastered the basics, you can use bows in various creative ways.
Home Décor
- Attach bows to wreaths and garlands.
- Decorate candles, vases, or picture frames.
Fashion and Accessories
- Create hair bows using fabric ribbons.
- Add bows to dresses, shoes, or handbags.
Holiday and Event Decorations
- Make festive bows for Christmas trees.
- Decorate wedding chairs, bouquets, or party favors.
Common Mistakes and How to Fix Them
Uneven Loops
- Measure the loops carefully before tightening the bow.
Frayed Ribbon Ends
- Use a hot knife or clear nail polish to seal the edges.
Bow Doesn’t Hold Its Shape
- Use wired ribbon for structured designs.
Final Thoughts
Making a bow out of ribbon is a simple yet elegant way to enhance gifts, décor, and accessories. With practice, you can master different styles and create beautiful bows for any occasion. Whether you prefer a classic bow, a layered design, or a structured wired bow, this skill is a valuable addition to your DIY projects.
Now, grab some ribbon and start crafting your perfect bow!