To sew elastic directly to fabric, first determine the length of the elastic needed. Then, stretch the elastic and sew it in place with a zigzag stitch.
It’s important to stretch the elastic as you sew to ensure it fits snugly against the fabric. Sewing elastic directly to fabric is a useful skill to have for a variety of projects, including waistbands, cuffs, and neckline finishes. Elastic can be used to add comfort, shape, and structure to garments.
It’s important to choose the correct width and type of elastic for your project. Once you have the right elastic, you can easily sew it directly to the fabric using a zigzag stitch. This method is quick and easy, and results in a professional-looking finish. With a little practice, you’ll be able to sew elastic to fabric with ease.
Contents
- Introduction To Sewing Elastic To Fabric
- Materials And Tools Required
- Preparing Your Fabric
- Cutting Elastic To The Right Length
- Attaching Elastic With Sewing Machine
- Sewing Elastic Directly By Hand
- Finishing Touches For Elastic Attachment
- Troubleshooting Common Issues
- Creative Uses For Elastic In Sewing Projects
- Maintaining Elasticity In Sewn Fabrics
- Frequently Asked Questions
- Conclusion
Introduction To Sewing Elastic To Fabric
Sewing elastic directly to fabric is a useful technique in garment construction, providing a comfortable and flexible fit. In this article, we will explore the importance of elastic in garment construction and the types of elastic suitable for direct sewing.
Importance Of Elastic In Garment Construction
Elastic plays a crucial role in garment construction as it provides stretch and allows for ease of movement. It helps garments to conform to the body’s shape, ensuring a comfortable and secure fit. Whether used in waistbands, cuffs, or other areas, elastic contributes to the overall comfort and functionality of the garment.
Types Of Elastic Suitable For Direct Sewing
When sewing elastic directly to fabric, it’s important to choose the right type of elastic. Flat braided elastic is ideal for waistbands and other areas where a comfortable, non-binding stretch is required. Knitted elastic is suitable for a wide range of garments and is often used in swimwear and sportswear. Woven elastic offers excellent shape retention and is commonly used in applications where a firmer hold is needed.
Materials And Tools Required
For sewing elastic directly to fabric, you will need a few materials and tools. These include a sewing machine, elastic, fabric, pins, scissors, and a measuring tape. By following the step-by-step instructions, you can easily attach the elastic to your fabric and create a secure and comfortable fit.
To sew elastic directly to fabric, you will need a few essential materials and tools. By gathering these items beforehand, you can ensure a smooth and efficient sewing process. Here’s a breakdown of what you’ll need:Choosing The Right Elastic
It is crucial to select the appropriate elastic for your sewing project. Consider the following factors when choosing elastic for sewing:- Width: The width of the elastic will depend on the desired stretch and the weight of the fabric. Generally, wider elastics provide more support and stability.
- Composition: Elastic can be made from various materials, such as polyester, cotton, or latex. Each type has its own characteristics, so choose one that suits your fabric and intended use.
- Stretch: Elastic comes in different levels of stretchiness. Determine the amount of stretch required for your project and choose elastic accordingly.
- Color: Select a color that complements or matches your fabric. If the elastic will be visible, choose a color that blends seamlessly.
Essential Sewing Supplies
Apart from elastic, you will need a few basic sewing supplies to successfully sew elastic directly to fabric. Here are the essential tools you should have on hand:| Item | Description |
|---|---|
| Sewing Machine | A reliable sewing machine with a straight stitch setting will make the process much easier. |
| Needles | Choose the appropriate needle type and size for your fabric. Ballpoint or stretch needles are ideal for elastic fabrics. |
| Thread | Select a thread color that matches your fabric or elastic. Polyester or nylon threads are often recommended for elastic sewing. |
| Pins or Clips | Use pins or clips to secure the elastic and fabric together before sewing. |
| Scissors | A sharp pair of fabric scissors will help you cut the elastic and fabric accurately. |
| Measuring Tape | Measure the length of elastic required for your project to ensure a proper fit. |
| Iron and Ironing Board | Pressing the fabric and elastic with an iron will help create neat and professional-looking results. |
Preparing Your Fabric
Prepare your fabric for sewing elastic directly to it by following these simple steps. First, ensure your fabric is clean and free of any wrinkles. Next, measure and cut the elastic to the desired length. Then, pin the elastic to the fabric at regular intervals to keep it in place.
Finally, sew the elastic directly onto the fabric using a zigzag stitch, stretching it slightly as you sew to ensure a snug fit.
Before sewing elastic directly to fabric, it’s important to properly prepare your fabric. This includes considering pre-wash fabric considerations and marking and measuring for elastic placement.Pre-wash Fabric Considerations
When starting a sewing project, it’s essential to pre-wash your fabric to prevent any shrinkage or color bleeding after the garment is complete. Here are a few considerations to keep in mind:- Check the fabric care instructions to determine the appropriate washing method.
- Use a mild detergent to avoid any potential damage to the fabric.
- Separate light and dark-colored fabrics to prevent color transfer.
- Wash the fabric in cold water to minimize shrinkage.
- Gently dry the fabric by laying it flat or hanging it to air dry.
Marking And Measuring For Elastic Placement
Once your fabric is pre-washed and ready to go, it’s time to mark and measure for the placement of the elastic. This step ensures that the elastic is evenly distributed and provides the desired fit. Here’s how to do it:- Identify the areas where you want to sew the elastic. This could be the waistband, cuffs, or any other desired location.
- Measure the circumference of the area where the elastic will be attached using a measuring tape. Ensure the tape is snug but not too tight.
- Divide the measured circumference by the desired number of elastic channels to determine the width of each channel.
- Using tailor’s chalk or a washable fabric marker, mark the fabric at regular intervals to indicate the start and end points of each elastic channel.
- For accuracy, use a ruler or a straight edge to connect the marked points and create straight lines for sewing.

Credit: www.thecreativecurator.com
Cutting Elastic To The Right Length
When it comes to sewing elastic directly to fabric, one of the most crucial steps is cutting the elastic to the correct length. Whether you are working on a waistband, cuff, or any other project that requires elastic, getting the length right is essential for a comfortable fit. In this section, we will explore how to calculate the elastic length for comfort and share some useful tips for cutting elastic accurately.
Calculating Elastic Length For Comfort
Calculating the correct length of elastic ensures a comfortable fit for your garment. To determine the ideal length, follow these simple steps:
- Measure the area where the elastic will be attached, such as the waist or wrist.
- Add a small amount of ease to the measurement to allow for movement and comfort. Typically, adding 1-2 inches is sufficient, but it may vary depending on the project and personal preference.
- Consider the stretchiness of the elastic. If you are using a highly stretchable elastic, you may need to reduce the length slightly to achieve the desired fit.
- Take into account any overlaps or closures that may affect the elastic length. For example, if you are sewing a waistband with a button or hook closure, adjust the length accordingly.
Tips For Cutting Elastic
To ensure precise cutting of elastic, keep these tips in mind:
- Use sharp fabric scissors or a rotary cutter to achieve clean, even cuts.
- If the elastic is wide, consider folding it in half lengthwise before cutting to make the process easier.
- Secure the elastic firmly to prevent any movement while cutting.
- Consider marking the desired length on the elastic before cutting to ensure accuracy.
- Double-check your measurements before making any cuts to avoid any unnecessary mistakes.
By following these simple steps and tips, you can confidently cut elastic to the right length, resulting in a comfortable and well-fitted garment.
Attaching Elastic With Sewing Machine
Learn how to attach elastic directly to fabric using a sewing machine. This simple technique eliminates the need for hand sewing and ensures a secure and professional finish. With step-by-step instructions, you’ll be able to sew elastic effortlessly and achieve the perfect fit every time.
Sewing elastic directly to fabric is a convenient way to add a stretchy waistband or cuffs to your clothing. One of the most efficient ways to attach elastic to fabric is by using a sewing machine. With the right stitch selection and a bit of practice, you can easily sew elastic to fabric with a sewing machine. In this blog post, we’ll cover the stitch selection for elastic sewing and the step-by-step process for attaching elastic with a sewing machine.Stitch Selection For Elastic Sewing
Before you start sewing elastic to fabric, it’s important to select the right stitch for the job. The most commonly used stitches for elastic sewing are the zigzag stitch and the three-step zigzag stitch. These stitches allow the fabric to stretch without breaking the thread. The zigzag stitch is the most basic stitch used for attaching elastic, while the three-step zigzag stitch is a stronger stitch that is ideal for heavy-duty fabrics.Step-by-step Machine Sewing Process
Here’s a step-by-step process for attaching elastic with a sewing machine:- Measure the length of the elastic needed for your project.
- Mark the fabric where you want to attach the elastic.
- Pin the elastic to the fabric at both ends.
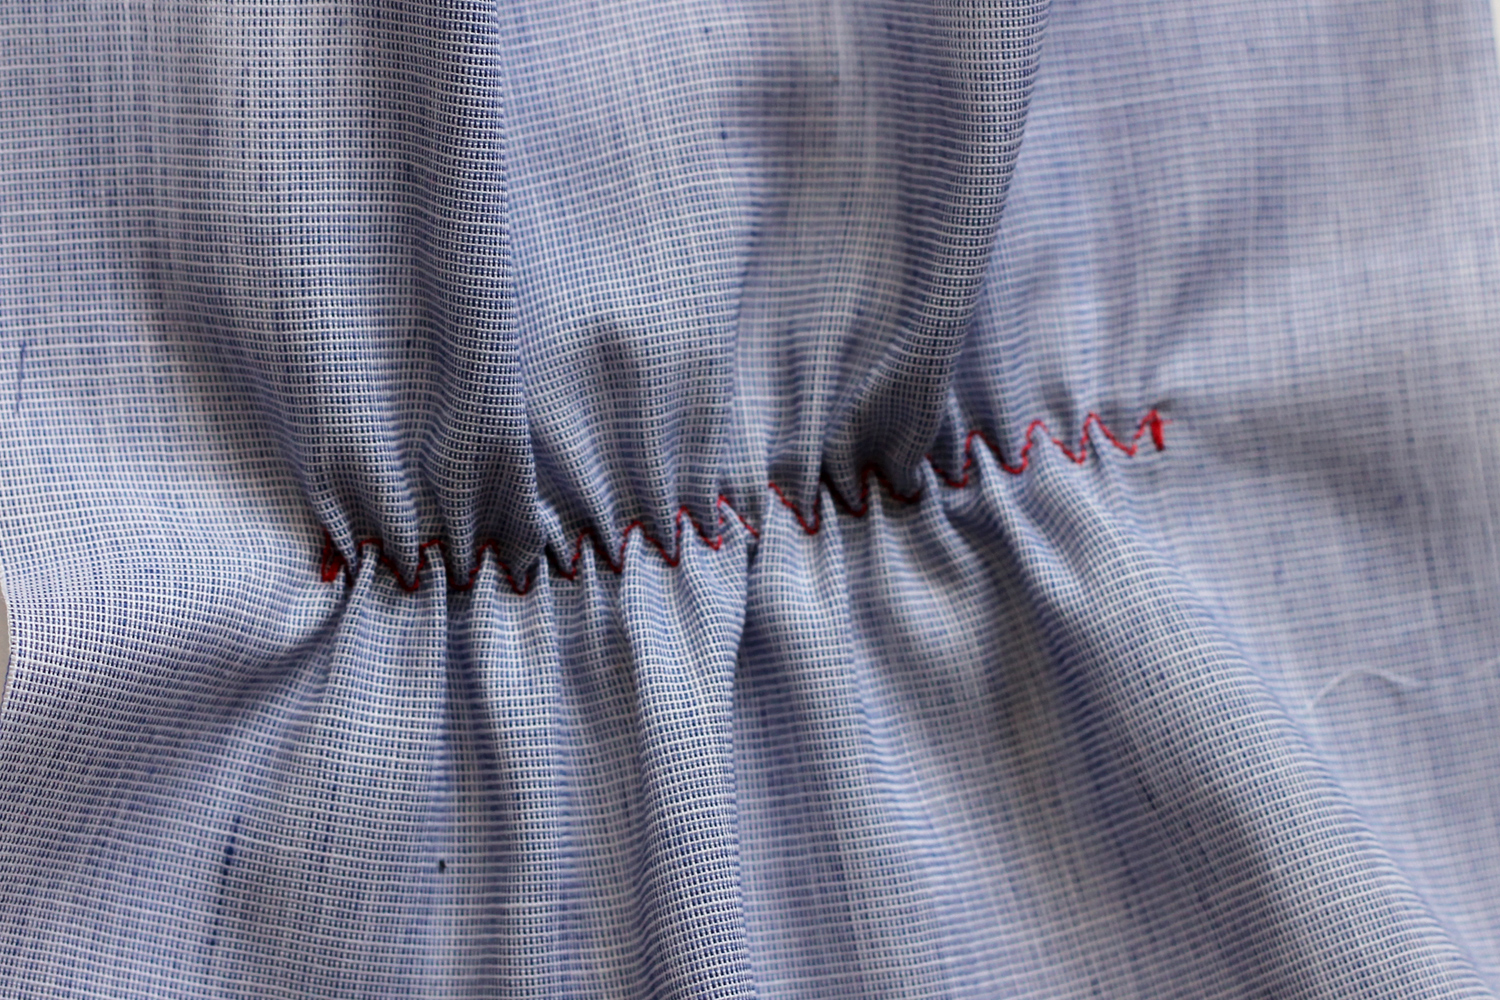
- Use a zigzag or three-step zigzag stitch to sew the elastic to the fabric. Make sure to stretch the elastic as you sew to match the length of the fabric.
- Once you’ve sewn the elastic to the fabric, you can fold the fabric over and sew it in place to create a waistband or cuff.
Sewing Elastic Directly By Hand
Sewing elastic directly by hand is a simple way to add stretch to your fabric. Start by pinning the elastic in place and using a zigzag stitch to secure it. Gently stretch the elastic as you sew to ensure a snug fit.
Hand Stitch Techniques For Elastic
Sewing elastic directly by hand can be a simple and effective way to add stretch to your fabric. Follow these hand stitch techniques for a secure finish:
- Use a whip stitch for a discreet and stretchy seam.
- Try a running stitch for a quick and easy way to attach elastic.
- Secure the ends with a backstitch for added durability.
Securing Elastic Without A Sewing Machine
If you don’t have access to a sewing machine, sewing elastic directly by hand is a handy skill to have. Here’s how you can secure elastic without a machine:
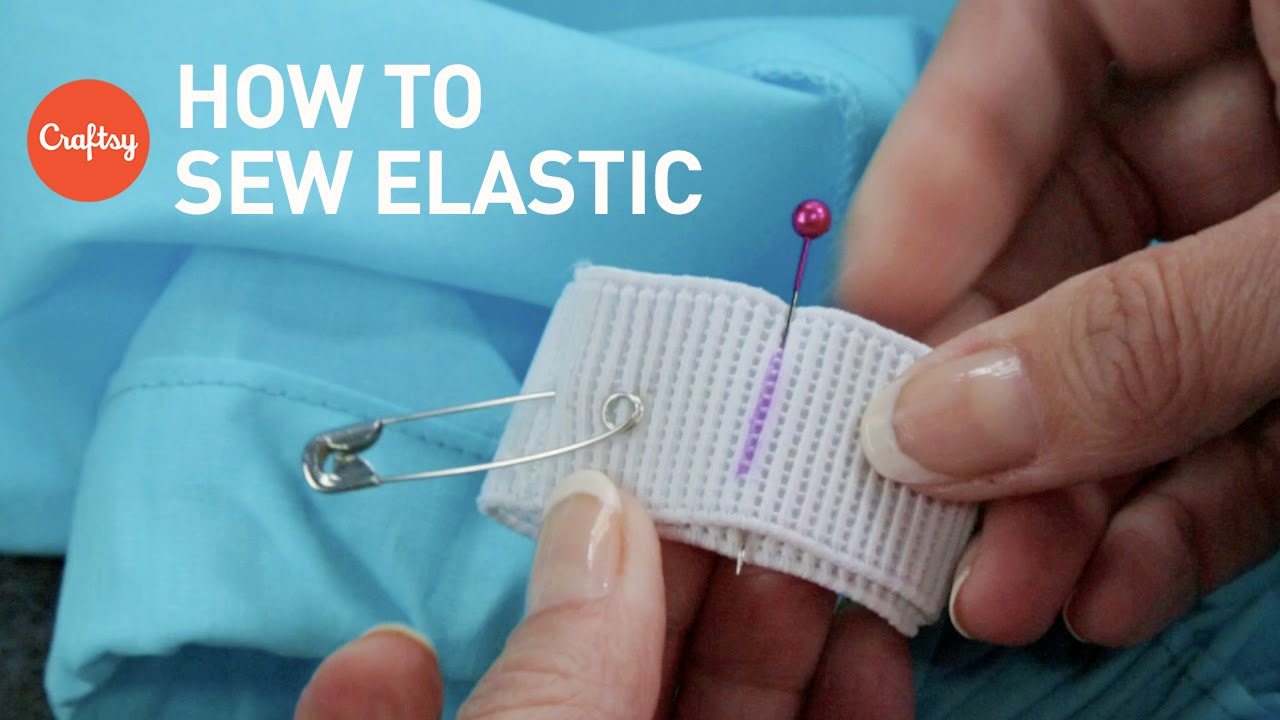
- Measure and cut the elastic to your desired length.
- Pin the elastic in place on the fabric.
- Thread a needle and knot the end.
- Begin stitching the elastic to the fabric using one of the hand stitch techniques mentioned above.
- Ensure the elastic is evenly distributed as you sew for a professional finish.
Finishing Touches For Elastic Attachment
When it comes to finishing touches for elastic attachment, ensuring the final steps are done correctly is crucial for a polished outcome.
Trimming And Cleaning Edges
Trim excess fabric close to the stitched elastic for a neat finish.
Testing Elasticity And Comfort Fit
- Check the stretch of the elastic to ensure flexibility.
- Wear the garment to assess comfort and fit.
Credit: www.sewdiy.com
Troubleshooting Common Issues
To troubleshoot common issues when sewing elastic directly to fabric, ensure the correct tension settings on your sewing machine. Use a stretch needle and a narrow zigzag stitch to prevent the fabric from puckering. Additionally, gently stretch the elastic as you sew to ensure a smooth and even finish.
Resolving Uneven Elastic Stretch
If the elastic is stretching unevenly, adjust the tension settings on your sewing machine.
Fixing Twisted Or Rolled Elastic
To fix twisted or rolled elastic, carefully unpick the stitches and resew the elastic.
Creative Uses For Elastic In Sewing Projects
Discover creative ways to sew elastic directly to fabric in your sewing projects. Learn how to use elastic for waistbands, sleeves, and more to add comfort and style to your garments. With these techniques, you can achieve professional-looking results in your sewing endeavors.
Innovative Garment Design Ideas
Transform traditional garments with unique elastic applications.
Use elastic to create ruching, gathers, or adjustable waistbands.
Experiment with elastic in sleeves, necklines, and hems for a modern twist.
Add flair to skirts by incorporating elastic for comfort and style.
Accessorizing With Elastic
Enhance bags, headbands, and belts with elastic accents.
Create stretchy closures for pouches, wallets, and accessories.
Craft trendy hair ties, bracelets, and chokers using colorful elastic.
Maintaining Elasticity In Sewn Fabrics
Maintaining elasticity in sewn fabrics is crucial for creating comfortable and well-fitted clothing. One effective technique is to sew elastic directly to the fabric, ensuring a secure and durable hold. This approach is particularly useful for waistbands and cuffs, and can be achieved with a variety of stitching methods.
Maintaining Elasticity in Sewn Fabrics is crucial to ensure that the fabric retains its original shape and size. Sewing elastic directly to fabric is a popular technique used in making clothing, accessories, and household items. However, over time, elastic can lose its stretch and become saggy, leading to an unappealing appearance. To prevent this, it is essential to take proper care of the fabric and elastic. In this blog post, we will discuss some tips on Proper Care and Washing and Long-term Storage Tips to help maintain the elasticity of sewn fabrics.Proper Care And Washing
Proper Care and Washing of sewn fabrics are vital in maintaining the elasticity of the fabric. Here are some tips to ensure that your fabric and elastic remain in good condition:- Always read the care label on the fabric before washing or cleaning.
- Wash the fabric in cold water to prevent shrinkage and damage to the elastic.
- Avoid using fabric softeners or bleach as they can damage the elastic.
- Air dry the fabric instead of using a dryer, as the heat can damage the elastic.
- Avoid hanging the fabric as it can stretch the elastic out of shape.
Long-term Storage Tips
Proper storage of sewn fabrics is essential in maintaining their elasticity. Here are some tips on long-term storage:| Tip | Description |
|---|---|
| Store in a dry place | Moisture can damage the elastic, so it is essential to store the fabric in a dry place. |
| Store flat or rolled | Hanging the fabric can stretch the elastic, so it is best to store the fabric flat or rolled. |
| Use acid-free tissue paper | When storing delicate fabrics, use acid-free tissue paper to prevent yellowing or discoloration. |
| Check regularly | Check the fabric regularly to ensure that the elastic is still in good condition and has not lost its stretch. |
Credit: www.youtube.com
Frequently Asked Questions
How Do You Attach Elastic Directly To Fabric?
To attach elastic directly to fabric, first measure and cut the elastic to the desired length. Then, pin the elastic to the fabric at the desired location. Sew the elastic to the fabric with a zigzag stitch, stretching the elastic as you sew to ensure it fits the fabric properly.
Finally, remove the pins and enjoy your newly elasticized fabric.
What Is The Best Stitch To Attach Elastic To Fabric?
The best stitch to attach elastic to fabric is the zigzag stitch. It allows the elastic to stretch without breaking the thread.
Do You Stretch Elastic When Sewing?
Yes, it’s important to stretch elastic when sewing to ensure a proper fit and prevent puckering. Be careful not to overstretch, as it can cause the fabric to pucker.
How Do You Sew Elastic To Gather Fabric?
Sew elastic to gather fabric by stretching it while sewing with a zigzag stitch. Align the edge of the elastic with the fabric edge, and stitch. The stretched elastic will create gathers in the fabric. Trim any excess elastic for a neat finish.
Conclusion
Incorporating elastic directly into fabric can add versatility and comfort to your sewing projects. By mastering this technique, you can create stylish and functional clothing and accessories. With practice and attention to detail, you can elevate your sewing skills and take your creations to the next level.
Happy sewing!