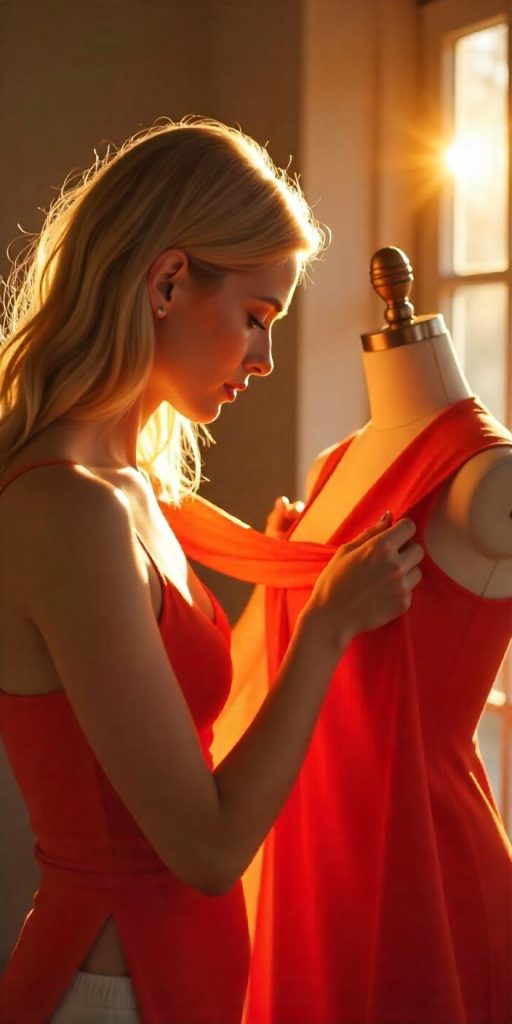
Draping is one of the most artistic and transformative techniques in the fashion design world. It allows designers to create garments directly on a dress form, bringing ideas to life with fabric rather than flat patterns. For many, this tactile process is where fashion design truly begins — with fabric, pins, and imagination.
In this in-depth guide, you’ll learn everything you need to know about how to drape fabric for fashion design. Whether you’re a student, aspiring designer, or self-taught creator, you’ll gain practical skills and inspiration to take your designs to the next level.
Contents
- What Is Fabric Draping in Fashion Design?
- Why Learn Fabric Draping?
- Tools You Need to Start Draping
- How to Drape Fabric for Fashion Design: Step-by-Step Guide
- Advanced Draping Techniques
- Tips for Successful Draping
- Famous Fashion Designers Known for Draping
- Frequently Asked Questions About Draping
- Final Thoughts: Mastering the Art of Fabric Draping
What Is Fabric Draping in Fashion Design?
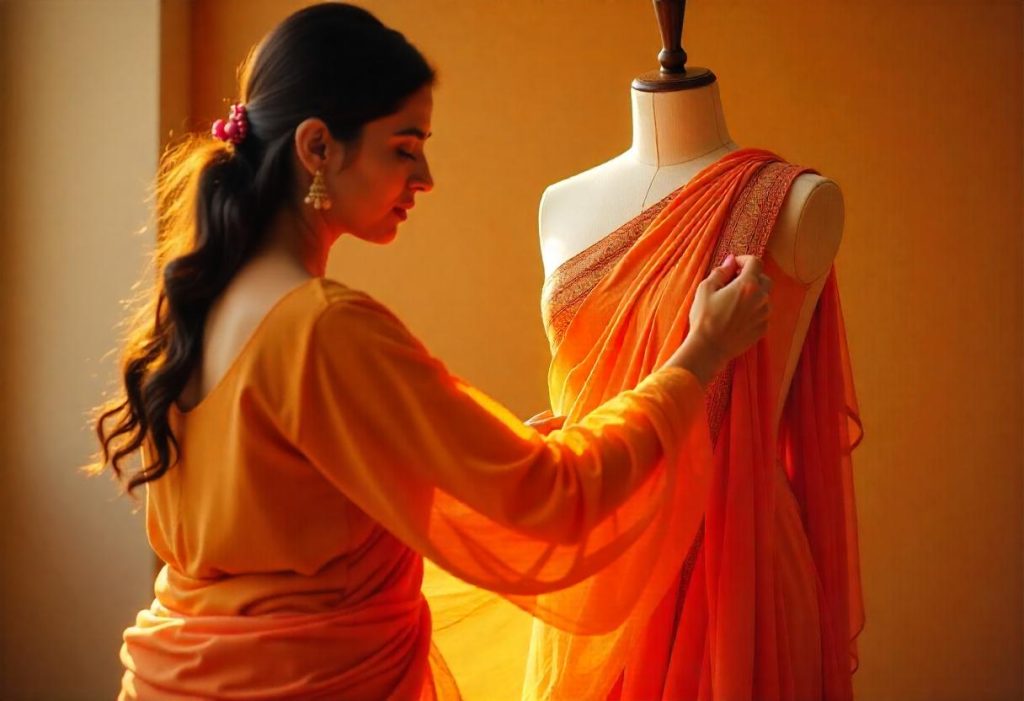
Draping in fashion design is the process of positioning and pinning fabric on a dress form to develop the structure of a garment. Unlike flat pattern making, which begins with paper templates, draping allows designers to work three-dimensionally, shaping the garment as they go.
This method helps you:
- Visualize how the fabric flows on a body
- Experiment with pleats, gathers, and folds
- Create original silhouettes
- Make quicker design decisions
Draping is both technical and artistic. It combines precision with creativity, offering an intuitive way to bring designs to life before they’re transferred to paper patterns.
Why Learn Fabric Draping?
Before diving into the steps, let’s look at why every fashion designer should learn to drape.
Develop a Deeper Understanding of Fabric
Different fabrics behave differently. Draping helps you understand how weight, stretch, and texture impact the final look of a garment.
Improve Your Design Process
Draping can speed up design development. Rather than guessing how a garment will look, you get immediate visual feedback.
Create Unique, Organic Shapes
Some of the most iconic fashion pieces started as spontaneous experiments on a dress form. Draping lets you tap into that creativity.
Tools You Need to Start Draping
Before you begin, gather the essential tools for fabric draping. Investing in quality materials will improve accuracy and comfort while working.
Dress Form
A pinnable dress form is essential. It should be close to the body measurements you’re designing for (standard size or custom).
Muslin Fabric
Use muslin as your base fabric for practice draping. It’s inexpensive, easy to mark on, and mimics various fabric types depending on weight.
Pins
Sharp dressmaker pins will secure your fabric in place. Use plenty — at least 100 to start.
Measuring Tape
A soft measuring tape helps you check proportions, lengths, and symmetry.
Fabric Scissors
Sharp scissors are a must. Dull blades can distort cuts and affect your drape.
Tailor’s Chalk or Fabric Marker
You’ll need this for marking seam lines, darts, folds, and notches on your fabric.
L-Square and French Curve
For measuring right angles and drawing curved seam lines.
How to Drape Fabric for Fashion Design: Step-by-Step Guide
Now that you’re prepped with tools and materials, it’s time to get hands-on. Here’s how to drape fabric on a dress form in a structured, repeatable way.
Step 1: Prepare the Dress Form
Before you begin, dress your form with a tight-fitting cover or use padding if needed to match your client or model’s measurements. Mark the key reference lines with twill tape:
- Center front and center back
- Bust, waist, and hip lines
- Princess lines (if relevant)
- Shoulder and neckline seams
These guidelines help keep your draping symmetrical and aligned.
Step 2: Cut and Prepare Your Muslin
Cut muslin slightly larger than your intended design area. For a bodice, you might cut a rectangle 18” x 24”, depending on size. Always add 1–2 inches extra for seam allowance and pinning ease.
Press the muslin to remove creases. Mark grainlines, center points, and horizontal/vertical guidelines on the fabric.
Step 3: Establish the Grainline
Place your muslin on the form with the grainline aligned vertically (parallel to center front). This is essential — if your grainline is off, the entire garment may twist or hang incorrectly.
Pin the muslin at the shoulder and bust to secure.
Step 4: Shape the Fabric Around the Form
Gently shape the muslin to fit the form:
- Smooth over the bust and pin excess in the dart area
- Pull the fabric snug at the waist
- Add temporary pleats or folds where needed
- Avoid pulling the fabric off-grain
Let the fabric tell you what it wants to do — this is where your creativity shines. You can start to see design lines, gathers, and volume come to life.
Step 5: Mark Design Lines
With the fabric securely pinned and shaped:
- Use chalk or marker to draw seam lines, darts, neckline, armholes, and any other design features.
- Mark notches, grainline, and match points to guide pattern transfer later.
Be precise. This step bridges your 3D drape with your flat pattern.
Step 6: Add Seam Allowances
Once your design lines are marked, remove the muslin carefully and lay it flat. Add seam allowances around all edges (typically 1/2” or 5/8”) unless you already included them.
Step 7: True the Pattern
Smooth out the muslin on a flat table and correct any irregular lines using a ruler or French curve. Check symmetry by folding the piece along center lines. This process is called “truing” and ensures your pattern will sew accurately.
Step 8: Transfer to Paper Pattern
Once trued, trace the muslin pieces onto pattern paper. Label everything: grainlines, notches, seam lines, and style notes.
You’ve now created a working pattern directly from your draped design!
Advanced Draping Techniques
Once you’ve mastered the basics, you can explore more advanced fabric draping techniques to elevate your designs.
Bias Draping
Working with fabric cut on the bias (diagonally to the grain) allows for a soft, flowing fit. Bias draping is ideal for evening gowns and dresses with movement.
Sculptural Draping
Designers like Issey Miyake and Iris van Herpen use sculptural draping to create avant-garde pieces. You’ll experiment with exaggerated shapes, foam inserts, and unconventional materials.
Draping with Stretch Fabrics
Draping with jersey, spandex, or knits requires a different approach. You’ll use less pinning, and the fabric must be supported so it doesn’t sag.
Draping Sleeves, Collars, and Skirts
Once you’re confident with bodices, move on to draping full garments. Draped sleeves, cowls, peplums, and flared skirts can all be created directly on the form.
Tips for Successful Draping
- Use the right fabric: Choose muslin for basics; switch to your final fabric later to check the final drape.
- Work symmetrically: Always drape one half, then mirror it for precision.
- Keep fabric taut but not stretched: Smooth, pin, and adjust regularly to avoid pulling off grain.
- Experiment: Don’t be afraid to try wild shapes. Some of the best ideas come from accidents.
- Photograph your drape: Before removing the fabric from the form, take pictures. This helps with construction reference.
- Practice makes perfect: Like drawing, draping is a skill that improves the more you do it.
Famous Fashion Designers Known for Draping
Many top designers are known for their mastery of draping. Their work shows how this technique can be both functional and revolutionary.
Madeleine Vionnet
Often considered the queen of bias draping, Vionnet’s 1930s gowns set the standard for elegant, flowing silhouettes.
Madame Grès
Known for her Grecian-inspired pleats and sculptural folds, Grès created timeless dresses with intricate hand draping.
Yohji Yamamoto and Rei Kawakubo
These Japanese designers push the boundaries of fabric manipulation, often creating unconventional shapes through draping.
Alexander McQueen
McQueen used draping for dramatic silhouettes, theatrical proportions, and emotionally powerful designs.
Frequently Asked Questions About Draping
Can I drape without a dress form?
Technically yes, but it’s much harder. Some designers drape on mannequins or themselves using mirrors. However, a professional dress form will give the best results.
How do I know if my drape is symmetrical?
Always mark center lines and grainlines. Use a measuring tape to check key points like bust width, shoulder drop, and waist length on both sides.
What’s the difference between draping and flat pattern making?
Draping is three-dimensional and intuitive, while flat pattern making uses paper to create designs based on measurements and calculations. Many designers use both.
Can I drape with final fabric instead of muslin?
You can — and often should — for soft silks, chiffon, or knits that behave very differently than muslin. Just be aware these fabrics can be harder to control.
Final Thoughts: Mastering the Art of Fabric Draping
Draping is more than just a method — it’s a mindset. It teaches you to work with your hands, respond to the fabric, and build a garment from the body outward. It connects you with the artistry of fashion in a very real, tactile way.
Whether you’re designing for haute couture, ready-to-wear, or costume design, draping opens up a new world of creativity and craftsmanship. Master the basics, trust your instincts, and never stop experimenting.
Ready to take your designs from concept to creation? Start draping today, and you’ll be amazed at what your hands can create.