Granny squares are a classic crochet motif that have stood the test of time. From cozy afghans to trendy tote bags, granny squares are incredibly versatile and beginner-friendly. Whether you’re completely new to crochet or looking to master this nostalgic stitch pattern, this complete guide will teach you how to crochet a granny square from the very beginning.
By the end of this post, you’ll know exactly how to create your first granny square, how to read a pattern, how to troubleshoot common mistakes, and how to turn your squares into larger projects. Let’s jump in and start stitching!
Contents
- What Is a Granny Square?
- What You Need to Make a Granny Square
- Understanding the Stitches Used in Granny Squares
- The Classic Granny Square Pattern Explained
- Step-by-Step Instructions to Crochet a Basic Granny Square
- Changing Colors Between Rounds
- Tips for Making Perfect Granny Squares
- Joining Granny Squares Together
- Beginner Project: Granny Square Blanket
- More Granny Square Variations
- Common Mistakes When Crocheting Granny Squares
- How to Care for Finished Granny Square Projects
- Beginner-Friendly Granny Square Projects
- Final Thoughts: Mastering the Granny Square
What Is a Granny Square?
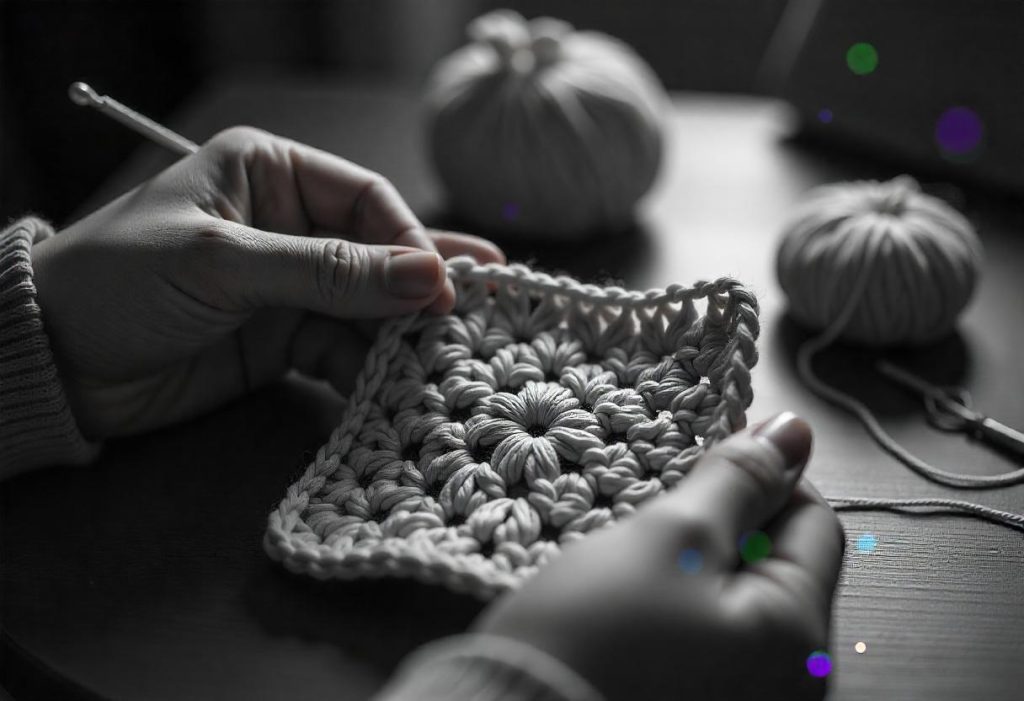
A granny square is a small, square-shaped crochet motif worked in rounds. Traditionally, it uses a combination of chain stitches and double crochet stitches to form a square that grows outward from the center. Granny squares are often made in colorful combinations and joined together to create larger items like blankets, scarves, bags, and garments.
Granny squares are ideal for beginners because:
- They are small and quick to make
- They allow you to practice foundational crochet skills
- You can use leftover yarn to create colorful pieces
- They are easy to join together into larger items
What You Need to Make a Granny Square
Before we begin, let’s go over the tools and materials you’ll need to crochet a basic granny square.
Yarn
Choose a medium weight (category 4) yarn for your first granny square. Acrylic or cotton yarn works best for beginners. Use different colors to create a multicolored square or stick to a single shade for simplicity.
Crochet Hook
A 5.0 mm (H-8) hook is a good size for worsted weight yarn. Check your yarn label for the recommended hook size.
Scissors
You’ll need scissors to trim your yarn when changing colors or finishing your project.
Tapestry Needle
A tapestry or yarn needle will help you weave in your yarn tails and finish your square neatly.
Understanding the Stitches Used in Granny Squares
Granny squares rely on a few simple stitches. Before starting your square, practice these foundational stitches.
Chain Stitch (ch)
Used to create the foundation ring and spaces between double crochet clusters.
Slip Stitch (sl st)
Used to join rounds together or move to the next stitch group.
Double Crochet (dc)
This is the primary stitch in granny squares. It’s tall, open, and creates the clusters that make up each side of the square.
The Classic Granny Square Pattern Explained
Now that you’re familiar with the materials and stitches, let’s work through a classic granny square pattern.
This version uses U.S. crochet terms and begins with a chain ring at the center, followed by four rounds of clusters.
Step-by-Step Instructions to Crochet a Basic Granny Square
Round 1: Create the Foundation Ring
- Make a slip knot.
- Chain 4.
- Slip stitch into the first chain to form a ring.
- Chain 3 (counts as your first dc).
- Work 2 double crochet into the ring.
- Chain 2 (this creates your first corner).
- Work 3 double crochet into the ring, then chain 2 — repeat this two more times.
- Join with a slip stitch to the top of the initial chain-3.
You should now have four 3-dc clusters, separated by four ch-2 spaces (corners).
Round 2: Expand the Square
- Slip stitch over to the next ch-2 space.
- Chain 3 (counts as first dc), then work 2 dc into the same ch-2 space.
- Chain 2, then work 3 dc into the same ch-2 space (this completes the corner).
- Move to the next corner and 3 dc, ch 2, 3 dc into that ch-2 space.
- Repeat for all corners.
- Slip stitch to join.
You should now see a more distinct square with four corner spaces.
Round 3: Add Side Spaces
- Slip stitch to the next ch-2 corner space.
- Chain 3, 2 dc in the corner, ch 2, 3 dc in the same corner.
- Chain 1, 3 dc in side space (between clusters), chain 1.
- In the next corner: 3 dc, ch 2, 3 dc.
- Repeat all around.
- Join with a slip stitch.
Now your square has four corners and sides with a space between corners.
Round 4: One More Round
- Repeat the pattern: Corners are always 3 dc, ch 2, 3 dc, and sides are 3 dc in side space, ch 1.
- Finish with a slip stitch.
Your square should now be around 4×4 inches, depending on your tension and yarn.
Changing Colors Between Rounds
One of the best things about granny squares is the opportunity to play with color. Here’s how to change colors neatly:
- Finish your round by joining with a slip stitch.
- Cut the yarn and pull through.
- Insert your hook into the next ch-2 corner with the new color.
- Pull up a loop, chain 3, and begin the next round.
Changing colors at each round can give you a rainbow or striped look. Using the same color for all rounds creates a more uniform square.
Tips for Making Perfect Granny Squares
Granny squares are beginner-friendly, but a few tips can make your squares look cleaner and more professional.
Use Consistent Tension
Try to maintain even tension in your stitches so that your square doesn’t warp or pucker.
Count Your Stitches
Each side and corner should have the same number of clusters. Mistakes often come from skipped stitches or added stitches.
Block Your Squares
Blocking your finished square helps it hold its shape. To block, dampen the square slightly and pin it to a flat surface in a square shape. Let it dry completely.
Weave in Ends Securely
Granny squares have lots of ends if you’re changing colors. Weave them in with a tapestry needle and run them through several stitches to keep them hidden.
Joining Granny Squares Together
Once you’ve made several squares, you can join them to create a larger item. There are several popular joining techniques.
Slip Stitch Join
Place squares with right sides facing and use a slip stitch to join across the edge.
Whip Stitch Join
Use a tapestry needle and yarn to whip stitch the squares together with a clean edge.
Join-As-You-Go (JAYG)
This technique allows you to connect squares while working the final round, saving time and reducing the number of ends to weave in.
Beginner Project: Granny Square Blanket
Making a blanket out of granny squares is a classic and beginner-friendly project. Here’s a quick breakdown of the steps involved.
Materials Needed
- Worsted weight yarn in various colors
- Crochet hook (5.0 mm)
- Tapestry needle
- Scissors
Steps
- Crochet 48–100 granny squares (depending on desired blanket size).
- Block each square to make them uniform.
- Lay them out in a pleasing pattern.
- Join the squares using your preferred method.
- Add a border if desired.
You can also make smaller items like baby blankets, cushion covers, or shawls using the same technique.
More Granny Square Variations
Once you’ve mastered the classic version, try experimenting with these popular variations:
Solid Granny Square
Instead of working clusters separated by chain spaces, a solid granny square fills in the gaps for a denser fabric.
Sunburst Granny Square
This version uses puff stitches or clusters to create a radiating design, often with multiple color changes.
Circle-to-Square Granny
Begins with a circle in the center that transitions into a square shape by the final round.
These variations offer endless creative potential for more advanced projects.
Common Mistakes When Crocheting Granny Squares
Even simple patterns can trip you up if you’re not careful. Here’s what to watch out for and how to fix it.
Your Square Is Warping
This often happens from incorrect tension or too many stitches in a round. Make sure you’re not adding clusters where they don’t belong.
Your Corners Are Curling
This may be because you forgot to chain 2 at the corners. Always include the full corner sequence.
Uneven Edges
Missing chain spaces or skipping clusters can throw off your square’s symmetry. Count each cluster and chain carefully.
How to Care for Finished Granny Square Projects
Taking care of your handmade projects ensures they last for years to come.
Washing Instructions
Check your yarn label for guidance. Most acrylic yarns are machine washable, while wool or cotton may require hand washing.
Drying Tips
Lay your project flat to dry, especially if it’s been blocked or shaped. Avoid hanging as it may stretch out your work.
Storing Crochet Projects
Fold or roll blankets and garments. Store them in a clean, dry container. Consider using lavender or cedar sachets to keep away moths.
Beginner-Friendly Granny Square Projects
Once you’ve made a few squares, here are some easy projects to try:
Tote Bag
Join squares into panels and add straps to create a stylish bag.
Scarf
Join a row of granny squares into a long, colorful scarf.
Pillow Cover
Join squares into a square or rectangle to fit a pillow form, then crochet or sew the sides together.
Cardigan
Many trendy cardigans and sweaters use granny squares as a base. Start small and scale up!
Final Thoughts: Mastering the Granny Square
Granny squares are a timeless introduction to the world of crochet. They teach you essential stitches, build confidence, and open the door to more advanced projects. Whether you’re crafting a retro afghan or adding flair to a modern accessory, the granny square is a tool that never goes out of style.
As you gain experience, try experimenting with new colors, joining techniques, and square variations. The beauty of crochet is that you’re always just a hook and some yarn away from your next masterpiece.